For most of us, the kitchen is the busiest room place in the house. It is where we congregate for meals, grab quick snacks, and pack school lunch boxes. Keeping the fridge stocked with plenty of produce is essential to feeding a healthy family, but oftentimes we find ourselves tossing away spoiled food despite our good intentions. The USDA reports that Americans waste a staggering 30 to 40 percent of the country’s overall food supply.
These numbers are discouraging, but don’t despair! There are a few things we can do to help cut back on food waste in the kitchen and make the most of that good produce before it gets forgotten and tossed.
Know Your Produce
Not all veggies are created equal. That is, not all produce has the same shelf life. Different fruits and vegetables spoil at different rates.
Some vegetables need to be stored at room temperature, such as potatoes, onions, watermelon, grapefruit, zucchini, and even cucumbers. Just make sure that they are kept dry. Typically, these items can last up to 3 to 4 weeks if they are kept dry and cool. Zucchini and cucumber will last 7 to 10 days.
For root vegetables such as potatoes and carrots, that mature underground, the skin and dirt on them act as a protective barrier and can extend their shelf life. Try not to wash and peel until they are ready to be eaten, cooked, or frozen. Read more about storage and how do carrots go bad here.
Some produce can be left out on the counter until it ripens, then it needs to be moved to the refrigerator. Apricots, avocados, mangoes, melons, peaches, pears, pineapples, and plums can be kept at room temperatures for a few days, but then it is time to move them into the fridge.
Avocadoes, asparagus, blueberries, broccoli, carrots, cauliflower, whole corn, grapes, leafy greens, pomegranate, raspberries, and strawberries need to be placed directly in the fridge as soon as they come home from the grocery store or are harvested from the garden.
When to Freeze
One of the best ways to reduce kitchen waste is by utilizing the freezer. Properly freezing fruits and vegetables stops the spoiling process, sealing its freshness in place. Keep in mind, that while freezing produce does not detract from its quality, it does not enhance its freshness either. To enjoy tasty produce later, make sure it is at the peak of its freshness when it is placed in the freezer.
Vegetables that are soft or over-ripened when they are frozen will not be as savory later when they are thawed and eaten.
Some vegetables can be frozen whole in freezer bags, such as corn, carrots, and okra. Other veggies can be blanched or cut into whatever shape and size is preferred. Make sure that veggies from the garden have been scrubbed clean of any dirt and residue and rinsed well. Let the produce dry completely before placing it into freezer bags.
Freezing Tomatoes, Carrots, and Celery
While most fruit and veggies can be frozen easily and incorporated easily into recipes later, most cannot be thawed and eaten fresh. Tomatoes are a staple for many recipes such as soups, stews, chili, and salsa.
Many people grow their own tomatoes from tomato plants and look for ways to preserve bountiful harvests (to learn more about growing tomatoes, read here).
To freeze tomatoes, first boil them and remove the skin. Use a large pot and cover the tomatoes with water. Bring them to a roaring boil for several minutes. Once the tomatoes’ skin starts to change texture, remove them from the boiling water and place them in an ice bath.
The sudden change in temperature will prevent the skin from cooking and it can be peeled of easily. Once the skin has been pulled off, the tomatoes can be placed in freezer storage bags. When the tomatoes are completely cool, seal the bag and place them in the freezer.
Be sure to write the date on the bag with a permanent marker so that they can be used within one year of their freeze date.
Whole carrots can stay fresh for 3 to 4 weeks, but if they will not be eaten within that time-frame, they are easy to freeze. Carrots that are frozen and thawed will not have the same crisp crunch and distinct taste that fresh carrots have, but they are great for cooking. Make sure the carrots are completely clean and dry and cut away any green foliage from the top. Simply place whole carrots into gallon size freezer bags or cut them up and place them in freezer bags.
Related Articles:
8 Easiest Tips to Clean Your Kitchen
How to Start a Balcony Kitchen GardenBest Office Breakfast Ideas to Supercharge Your Morning
It’s All About The Pacific Cod
They can be used within one year.
Celery is another commonly used veggie. While fresh celery has a crisp taste and firm structure, frozen celery will not maintain those characteristics. Celery’s make up is mostly water. The freezing process ruptures the cell walls and leaves the veggie limp and soggy.
While frozen celery cannot be thawed for a tasty snack, it can be thawed and incorporated into recipes. To seal in celery’s tangy taste, blanche it before freezing. Simply boil the celery for 3 to 4 minutes then let it cool and dry completely. Place it in freezer bags and label them with a permanent marker. Blanched celery that frozen needs to be eaten within four months.
Canning
Canning is a vintage art that is making a big comeback among vegetable gardeners looking for ways to preserve their harvest. Make sure that glass jars are completely sterile before adding fruits, jams, jellies, and veggies with a funnel. While jars can be re-used year after year, make sure to use new lids each canning season.
Fruits, vegetables, and beans require different pressure-cooking times at different temperatures. Research the different ways to safely can before getting started.
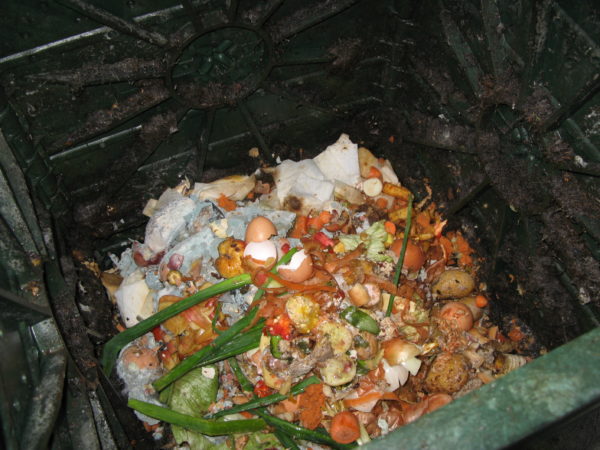
Composting
For foods and scraps that cannot be frozen, composting is a great way to cut down on kitchen waste and fertilize soil at the same time. Coffee grounds, tea bags, eggshells, fruit and veggie peels, and even used coffee filters and paper towels can be broken down into nutrient-rich, organic fertilizer. To create fertilizer at home, add kitchen scraps to a container or designate a section of the yard to pile up the kitchen waste.
Every 3 to 4 weeks, turn the composting ingredients with a shovel to let in air and aid in the chemical breakdown of the materials. Compost should also stay moist, although not sopping wet. Check periodically to make sure that the ingredients are not too dry and not too wet. Add a few drops of water if the compost is dry and some paper towels or newspaper clippings if it is too wet.
For a little extra help, add a few earthworms. Vermicomposting is a great way to speed up the composting process and results in even richer fertilizer.
Keeping a composting bucket or container in the kitchen is a great way to recycle kitchen scraps at home. We like to keep one under the kitchen sink in an air tight container. Keep a lid on the compost bucket and drill some holes near the top to allow air flow.
Add ingredients each day and give it a good shake every so often. After several months, the bucket will be full of black gold: a fertilizer rich in nitrogen, phosphorous, and potassium. Add it to the garden to help prepare the soil for another fruitful planting season.